Discussions in Tips and Techniques
| |
Listing 1 to 1 of 1 Replies PAGES: 1 | |
| RustyDice |  Detailing a WD Subscription Mini - My brushwork needs a serious brush up Detailing a WD Subscription Mini - My brushwork needs a serious brush up |
Member Since: August 28, 2013 RK: 1 MP: 0 | Monday October 13, 2014 3:14 PM Hey -I've been flat out on everything other than painting minis for about the last 3 months - had my first flying lesson, my first promotion at work and my first conference presentation all more or less rolling one month to the the next. I'm only getting some down time at the gym...oh and I joined a gym (lost 8.5kg and still going). I'm too late for this months threat and probably won't run one for a while - but I'd still like to get a few hours painting in every week so I don't completely give up. At the moment I'm slowly working on this little fella - I got him a good few years ago as a subscription perk and was the only reason I took out the subscription which quickly lapsed. I've stitched together the WIP shots to show the work done over two different sessions - and you should also spot how I got my act together with the layout of the pictures I'm not sure I know what I'm doing. I mostly use YouTube and various painting blogs for advice and inspiration and make a composite technique that I hope to give the result I'm aiming for. I prefer 'realistic' or at least 'plausible' looking a** kickers of the 4ok universe so that's the target. Here goes, feel free to add advice or just to point out I'm talking out my backside. 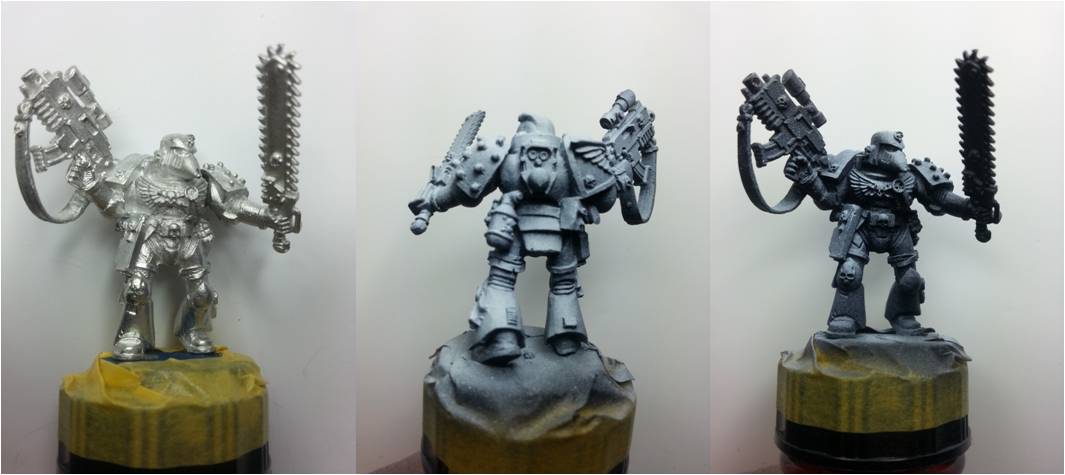 Looking left to right, the mini was cleaned of flash and mold lines and deburred. It was then given a light coating of VMA 71.097 Base Grey followed by VMA 71.057 Black. The black was applied holding the mini head down and spraying at a 45 degree angle making sure to hit all nooks and crevices where you'd expect shading. Once dry the mini was flipped right way up and sprayed pointing the airbrush down at a 45 degree angle with VMA 71.001 White to pick up the areas light should hit. This pre-shading was my first real attempt and seemed to go okay after I watched some YouTube tutorials and mixed together the best bits of several sources. 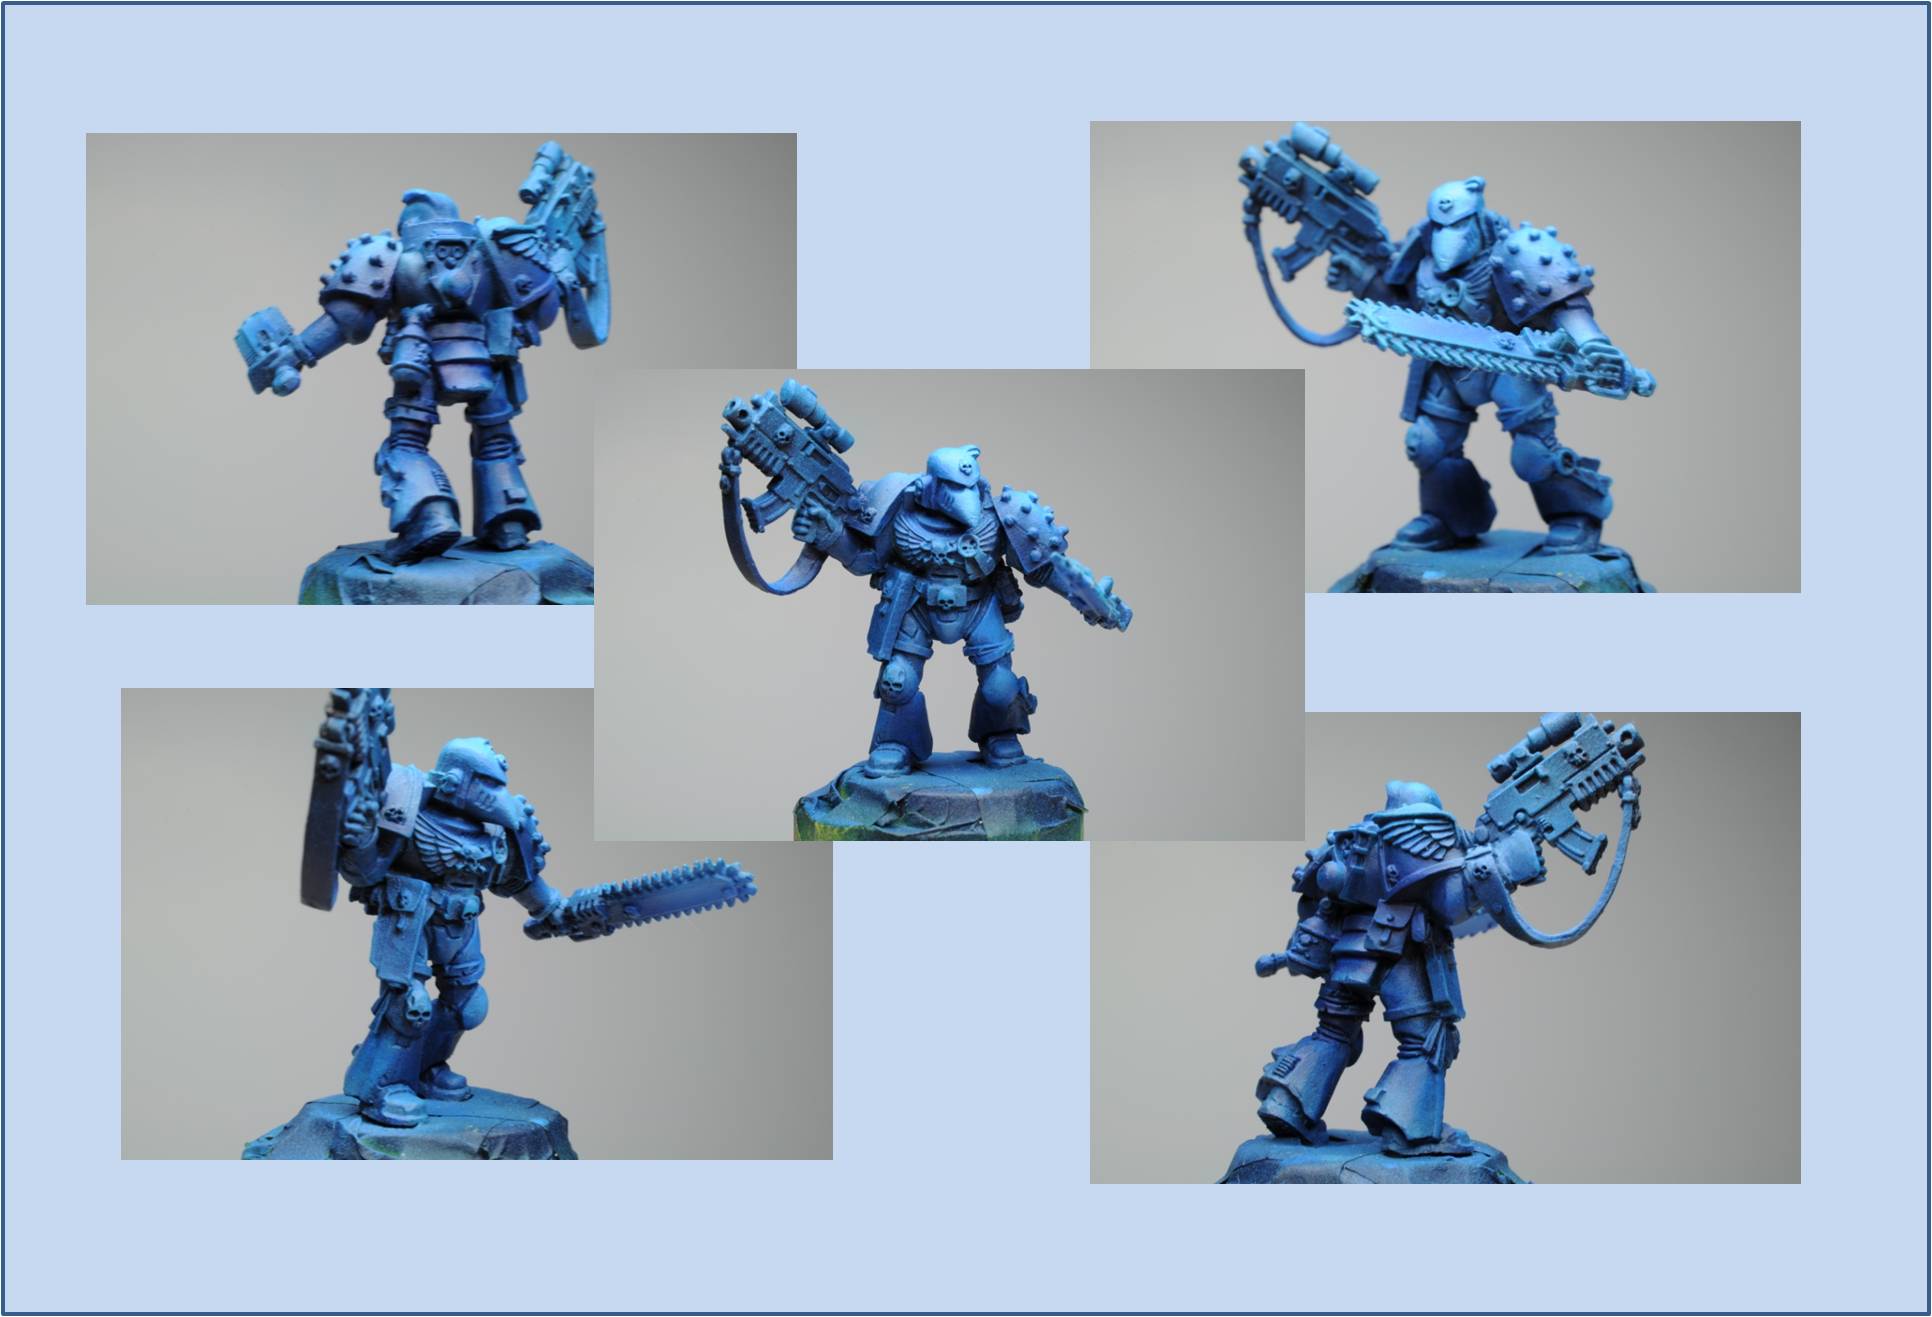 So for this I applied thinned down VMA 71.088 French blue 1:1 with tap water. You might wonder 'Why thin down already thinned paint?'. well this was just because I didn't want to swamp the pre-shading with what is actually quite a covering paint colour. You might wonder "Why spell color with a 'u'?', well this was just because. I built up this effect on about three light sprays of the blue, allowing the paint to dry completely (hair dryer) between coats. The result was the pre-shading showing through the blue paint, but the overall effect looking like solid colour but with a bit more depth (at least I think so). Like I said, this is a composite technique composed of what I've found raiding YouTube and the painting blogs that come to my attention - nothing revolutionary, The end was a light drybrush of French Blue and VMA 71.089 Light Sea Blue 1:1. So I'm a bit stuck for what to do next - regular brush work isn't something I'm too good at and I'm worried I'll mess him up to the point I'm really starting to procrastinate...don't think so? This is a 5oo word post for ****'s sake! I've got a really good cleaning agent for stripping minis like new - but I'd rather not have to resort to that. So advice on detailing would be much appreciated because I think it's really holding me back from painting up some of the more interesting minis in my collection. My P105 is cleaned and back in its box. My W&N Series 7's are ready to go - where do I start? Cheers in advance, RD In compliance with Flickr T&C the link to my page is here [[Edited by RustyDice on Monday October 13, 2014 3:21 PM]] Scientists study the world as it is; Engineers create the world that has never been. ~Theodore von Karman |
Listing 1 to 1 of 1 Replies PAGES: 1 | |